Official Luthiers Forum!

Owned and operated by Lance Kragenbrink
It is currently Sun Jul 13, 2025 3:11 am


All times are UTC - 5 hours


Post new topic Reply to topic  [ 22 posts ] 
Author Message
 Post subject:
PostPosted: Wed Oct 18, 2006 2:28 pm 
Offline
Cocobolo
Cocobolo
User avatar

Joined: Fri Mar 31, 2006 6:11 pm
Posts: 296
Location: United States
First name: Louis
Last Name: Freilicher
City: Belchertown
State: MA
Zip/Postal Code: 01007
Country: USA
Focus: Repair
Status: Professional
Well I've been looking around for some pickgurad material for an old
Gibson A-Jr. mandolin and I could not find anything I liked.

So I made a little mold and mixed up some West Systems epoxy in
dark red brown and amber to make my own blank.

The finished blank is about .1 thick and has the color and look I was
wanting.

The first shot is the epoxy in the aluminum foil covered mold. The
next day I ran the blank through my thickness sander to true up the
surfaces, then much wet sanding and buffing.

Enjoy!


_________________
- Louis Freilicher

Oh No! Not another learning experience!


Top
 Profile  
 
 Post subject:
PostPosted: Wed Oct 18, 2006 10:41 pm 
Offline
Brazilian Rosewood
Brazilian Rosewood
User avatar

Joined: Thu Aug 18, 2005 2:21 am
Posts: 2924
Location: Changes when ever I move..Australia
Focus: Build
Status: Amateur
Very clever Louis, I like the tortoise affect you achieved , very interesting.

Cheers

Kim


Top
 Profile  
 
 Post subject:
PostPosted: Thu Oct 19, 2006 8:51 am 
Offline
Contributing Member
Contributing Member
User avatar

Joined: Fri Aug 26, 2005 5:49 pm
Posts: 2915
Location: Norway
Interesting! Can we get a better picture, it is a little hard to tell exactly how it looks.

Have you started shaping the pickguard yet? Is so, was it easy to cut, shape and polish and so on? How stable does it seem?

This is how "Tot-Tis" is made too, no?Arnt39009.745625

_________________
Rian Gitar og Mandolin


Top
 Profile  
 
 Post subject:
PostPosted: Thu Oct 19, 2006 8:58 am 
Offline
Brazilian Rosewood
Brazilian Rosewood
User avatar

Joined: Wed Jun 22, 2005 10:11 am
Posts: 2761
Location: Tampa Bay
First name: Dave
Last Name: Anderson
City: Clearwater
State: Florida
Zip/Postal Code: 33755
Country: United States
That looks pretty good but is kind of hard to see.
I like the color.

_________________
Anderson Guitars
Clearwater,Fl. 33755


Top
 Profile  
 
 Post subject:
PostPosted: Thu Oct 19, 2006 10:34 am 
Offline
Cocobolo
Cocobolo
User avatar

Joined: Fri Mar 31, 2006 6:11 pm
Posts: 296
Location: United States
First name: Louis
Last Name: Freilicher
City: Belchertown
State: MA
Zip/Postal Code: 01007
Country: USA
Focus: Repair
Status: Professional
This thing is pretty hard to photograph but here's a few more.

So far the material seems to work and polish well. I cut the shape on
the band saw (with a zero clearance insert) with no chipping or
cracking. I sanded and polished it the same way I would a lacquer
finish.

The material (after 72 hours) is firm but a bit flexible, defiantly not
brittle

Louis


_________________
- Louis Freilicher

Oh No! Not another learning experience!


Top
 Profile  
 
 Post subject:
PostPosted: Thu Oct 19, 2006 12:18 pm 
Offline
Cocobolo
Cocobolo
User avatar

Joined: Fri Jul 28, 2006 4:06 pm
Posts: 170
Location: United States
Louis
Wow! that looks nice.
Great idea, glad you tried that.
Don't forget to show us the finished pickguard.

Tom

_________________
http://www.moriciguitar.com


Top
 Profile  
 
 Post subject:
PostPosted: Thu Oct 19, 2006 12:32 pm 
Offline
Old Growth Brazilian Rosewood
User avatar

Joined: Mon Dec 27, 2004 1:20 pm
Posts: 5915
Location: United States

How do you get the color in the epoxy, are you using powdered dyes? Liquid? I haven't tried to color the West epoxy...


_________________
Brock Poling
Columbus, Ohio
http://www.polingguitars.com


Top
 Profile  
 
 Post subject:
PostPosted: Thu Oct 19, 2006 12:42 pm 
Offline
Brazilian Rosewood
Brazilian Rosewood

Joined: Sun Dec 25, 2005 6:32 am
Posts: 7774
Location: Canada
Great results there Louis, i think i will try that too!


Top
 Profile  
 
 Post subject:
PostPosted: Thu Oct 19, 2006 2:29 pm 
Offline
Cocobolo
Cocobolo
User avatar

Joined: Fri Mar 31, 2006 6:11 pm
Posts: 296
Location: United States
First name: Louis
Last Name: Freilicher
City: Belchertown
State: MA
Zip/Postal Code: 01007
Country: USA
Focus: Repair
Status: Professional
The color is trans tint from stew mac. For this guard I mixed two
batched of epoxy. For the dark color I used four pumps of epoxy,
four drops of dark walnut, two drops cherry red and two drops of
vintage amber. The light color is 2 pumps of epoxy with four drops
of vintage amber.
I heated up the mold and the epoxy with my grizzly heat gun and
poured the dark color first. Then drizzled and swirled in the amber.
I tried to keep it heated to the point where I could see air bubbles
popping on the surface. Too much heat and the stuff will set up
faster and you will wind up with more air bubbles.

I'm just about done polishing up the finished guard, so I will post
more pics soon.

On a side note I'm doing the restoration on this mando in trade for a
pearl engraving workshop next Tuesday, so I’ll post something on
that when I get back home.

Louis

_________________
- Louis Freilicher

Oh No! Not another learning experience!


Top
 Profile  
 
 Post subject:
PostPosted: Thu Oct 19, 2006 10:05 pm 
Offline
Brazilian Rosewood
Brazilian Rosewood

Joined: Sun Dec 25, 2005 6:32 am
Posts: 7774
Location: Canada
Lookin' forward to that Louis, thanks!


Top
 Profile  
 
 Post subject:
PostPosted: Thu Oct 19, 2006 11:18 pm 
Offline
Old Growth Brazilian Rosewood
User avatar

Joined: Mon Dec 27, 2004 1:20 pm
Posts: 5915
Location: United States
[QUOTE=Louis4052] The color is trans tint from stew mac. For this guard I mixed two
batched of epoxy. For the dark color I used four pumps of epoxy,
four drops of dark walnut, two drops cherry red and two drops of
vintage amber. The light color is 2 pumps of epoxy with four drops
of vintage amber.
I heated up the mold and the epoxy with my grizzly heat gun and
poured the dark color first. Then drizzled and swirled in the amber.
I tried to keep it heated to the point where I could see air bubbles
popping on the surface. Too much heat and the stuff will set up
faster and you will wind up with more air bubbles.

I'm just about done polishing up the finished guard, so I will post
more pics soon.

On a side note I'm doing the restoration on this mando in trade for a
pearl engraving workshop next Tuesday, so I’ll post something on
that when I get back home.

Louis
[/QUOTE]

I am very intrigued by this.... thanks for this post.

I am still a little unclear however, how are you getting the bubbles out of it.


_________________
Brock Poling
Columbus, Ohio
http://www.polingguitars.com


Top
 Profile  
 
 Post subject:
PostPosted: Thu Oct 19, 2006 11:56 pm 
Offline
Brazilian Rosewood
Brazilian Rosewood
User avatar

Joined: Thu Aug 18, 2005 2:21 am
Posts: 2924
Location: Changes when ever I move..Australia
Focus: Build
Status: Amateur
[QUOTE=Brock Poling]
I am very intrigued by this.... thanks for this post.

I am still a little unclear however, how are you getting the bubbles out of it. [/QUOTE]

Hey Brock if I may jump in here for Louis,

I used to make fishing rods of various kinds. The cotton binding which hold the runners in place and decorate the the upper grip of the rod is coated with epoxy for strength and protection.

As part of the process, you apply moderate heat with a heat gun to the still liquid epoxy whilst the rod simultaneously spins on a rotisserie to prevent sag. The idea here is that the heat thins the epoxy making it less viscous. This then allows the epoxy to sink deeply into the cotton bindings and assist in the expulsion of air bubbles from the liquid.

The big secret here is to mix the epoxy very slowly trying to keep the air entering the mix to a minimum.

Whilst this system works very well it pays to keep in mind, as Louis has already suggested, that the heat also accelerates the setup time of the epoxy and, as I understand, also deteriorates the overall strength of the mix. In this application however, and likewise the pick guards I guess, strength is not really an issue.

It is very interesting and clever how Louis has used aluminium foil as a backing in the mold. This assist the reflection of light back through the epoxy adding so much to the colour, I really like what he has done here.

Well Done Louis

Cheers

Kim


Top
 Profile  
 
 Post subject:
PostPosted: Fri Oct 20, 2006 5:24 pm 
Offline
Cocobolo
Cocobolo
User avatar

Joined: Fri Mar 31, 2006 6:11 pm
Posts: 296
Location: United States
First name: Louis
Last Name: Freilicher
City: Belchertown
State: MA
Zip/Postal Code: 01007
Country: USA
Focus: Repair
Status: Professional
Thanks for the input Kim, very good info. The aluminum foil was
used on my second pour attempt. The wax paper from #1 is still
firmly attached to that blank. Most of the foil pealed off the blank
with almost no effort.
As for the air bubbles, I did end up with some on this pour. I used
the down side of the mold as my show side and sanded most of the
air bubbles out. Some I filled with thin CA as I sanded down the
backside of the guard. The small fills on this dark guard are
invisible from the front, but with lighter colors they many be more
apparent.
Since this blank was for an archtop instrument I wanted a thicker
blank than one would need for a flat top guitar. I think the thinner
pour would be easer to remove all the air bubbles from. Some of the
bigger ones I popped with an old high e string and they settled in
just fine.
The trick is to find a setting on your heat gun that gets the epoxy
thin enough to breath but not so hot that it sets up too fast. On my
first attempt I set the mold under a light bulb and wound up with an
island of very hard epoxy surrounded by a lake of thin epoxy. That
guard basically has a sun spot now.   In terms of the heat affecting
the cured strenth of the epoxy it may be a good thing for this use as
it may help keep the finished guard from becoming too brittle. This
stuff has about the flex you would expect from a .090” thick piece of
celluloid.

Well, here is a shot of the finished product. My only concerns at this
point are how this thing is going to hold up. I am hoping that it
doesn’t become brittle over time and crack. While I had this sucker
on the buffer for a final polish I did catch an edge and the guard hit
the concrete floor and survived, so I hope that's good news.

Louis


_________________
- Louis Freilicher

Oh No! Not another learning experience!


Top
 Profile  
 
 Post subject:
PostPosted: Sat Oct 21, 2006 2:59 am 
Offline
Koa
Koa

Joined: Sat Jan 01, 2005 3:49 pm
Posts: 908
Location: Canada
Nicely done!

You have me thinking... I use Greven's Tortis material for my mandolin pickguards, sticking it onto a piece of scrap guitar top spruce, then binding it with binding I cut from the same sheet of tortis material. It makes a stable, and very lightweigth pickguard, and the light colored spruce adds to the 'guards color and texture. I have also used flamed maple as the backer, giving yet more options for different 'looks'.

What I'm thinking you could try with what you've come up with, is to mix the epoxies directly on the spruce or maple backer. Perhaps this would allow a thin layer of epoxy that wouldn't need thickness sanding and wouldn't have a chance of becoming brittle with age. Also eliminates the foil step... All that would be needed would be a level sanding and buffing. Worth a shot if you want to keep messing with this sytem(and I think you should, as this looks really neat).

Here's an example of one of my guards. The shot was taken with flash to show the spruce underlay better, though it exaggerates the color a bit. as an added 'bonus', the spruce underlay will darken att eh same rate as the mandolin's top, so the 'guard should retain its color match as everything ages.


Top
 Profile  
 
 Post subject:
PostPosted: Sat Oct 21, 2006 7:08 am 
Offline
Koa
Koa
User avatar

Joined: Wed Mar 29, 2006 11:21 am
Posts: 805
Location: United States
First name: Jim Howell
Great idea! In a past life I worked for a company that made 'cultured marble' for bathrooms and kitchens. It is nothing more than epoxy resins colored to look like a variety of stone. The resins were molded on steel table tops with steel bar stock of varying length clamped in place. Barstock and table tops were waxed with an automotive wax as a release agent. Any paste wax works -- what ever is on sale.

Now to the meat of it regarding air bubbles: The tables had industrial strength vibrators that were turned on for the first ten minutes of so after the resin was placed in the mold. Entrained air bubbles all rose to the surface fairly quickly. The resin was designed to go off in about an hour

This could all be mimicked easily and inexpensively for those wishing to do custom pick guards, tail pieces, heel caps, etc.   

_________________
Jim Howell
Charlotte, NC


Top
 Profile  
 
 Post subject:
PostPosted: Sat Oct 21, 2006 7:46 am 
Offline
Old Growth Brazilian Rosewood
User avatar

Joined: Mon Dec 27, 2004 1:20 pm
Posts: 5915
Location: United States

It has been a long time since I was in a lab... but aren't there small vibrators 
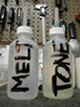
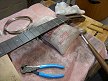
that are used for chemistry labs. I got a magnetic stirrer (to accelerate the dissolve time of shellac) from ebay for $12 and it works great.

_________________
Brock Poling
Columbus, Ohio
http://www.polingguitars.com


Top
 Profile  
 
 Post subject:
PostPosted: Sat Oct 21, 2006 10:45 am 
Offline
Koa
Koa

Joined: Sat Jan 01, 2005 3:49 pm
Posts: 908
Location: Canada
A simple vibrator could be readily made at home, using a speaker attached to a heavy cookie tin. Tune in your favorite talk show, and let the big voices do the vibrating. Or, connect the amp to your computer and it as a signal generator...

Or a piezo buzzer from Radio Shack, or.....

Lots of ways to go about it. Good ideas coming forth!


Top
 Profile  
 
 Post subject:
PostPosted: Sat Oct 21, 2006 10:59 am 
Offline
Brazilian Rosewood
Brazilian Rosewood
User avatar

Joined: Thu Aug 18, 2005 2:21 am
Posts: 2924
Location: Changes when ever I move..Australia
Focus: Build
Status: Amateur
Combined these ideas with a hair dryer to thin the mix and you would be done in no time.....and hey Mario, you could have Dylan's "Blow'in in the wind" playing on the stereo or maybe Carole King's "I feel the earth move" or how about "Shak'in all over" errrm...ok I'll shut up now.

Cheers

Kim


Top
 Profile  
 
 Post subject:
PostPosted: Sat Oct 21, 2006 11:10 am 
Offline
Brazilian Rosewood
Brazilian Rosewood
User avatar

Joined: Thu Aug 18, 2005 2:21 am
Posts: 2924
Location: Changes when ever I move..Australia
Focus: Build
Status: Amateur
And let us not forget the notoriously effective spin cycle on the washing machine. Tape Mario's big speaker on the lid of the machine with the mold on top of that, crank up the Hi-Fi with Pink Floyd's "Welcome to the machine" on full blast, hit the go button on the washer, switch on the hair dryer, and wait for the men in white coats to come and get ya just after the wife goes scream'in from the house. (they can get very protective of that spin cycle you know)

I'm pick'in up good vibrations. She's giv'in me excitations. larkim39011.859375


Top
 Profile  
 
 Post subject:
PostPosted: Sat Oct 21, 2006 3:29 pm 
Offline
Brazilian Rosewood
Brazilian Rosewood

Joined: Sun Dec 25, 2005 6:32 am
Posts: 7774
Location: Canada
Kim, AC/DC's " you shook me all night long" would be more appropriate to get 'em bubbles out, don't cha think?


Top
 Profile  
 
 Post subject:
PostPosted: Sat Oct 21, 2006 3:30 pm 
Offline
Brazilian Rosewood
Brazilian Rosewood

Joined: Sun Dec 25, 2005 6:32 am
Posts: 7774
Location: Canada
Great thread guys, very informative indeed, i'll know what to do now for home made pick guards, Thanks!


Top
 Profile  
 
Display posts from previous:  Sort by  
Post new topic Reply to topic  [ 22 posts ] 

All times are UTC - 5 hours


Who is online

Users browsing this forum: No registered users and 14 guests


You cannot post new topics in this forum
You cannot reply to topics in this forum
You cannot edit your posts in this forum
You cannot delete your posts in this forum
You cannot post attachments in this forum

Jump to:  
Powered by phpBB® Forum Software © phpBB Group
phpBB customization services by 2by2host.com